

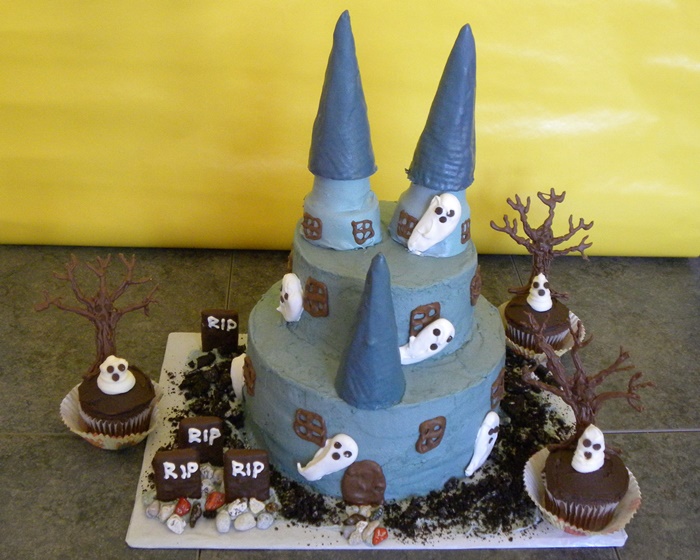
This haunted castle cake is fun to make with the kids. There are several steps, and components, but all of them are simple enough for children to help complete. When you’re done you’ll have the perfect cake for the centerpiece of your Halloween dessert table.

Haunted castle cake ingredients and materials:
- 2 cake mixes, or your favorite cake recipe doubled
- 2~ 9 inch round cake pans
- 2~ 6 inch round cake pans
- 4 cups white decorator icing
- Black food color
- 1 bag White melting chocolate
- 1 bag regular melting chocolate
- About 24 mini chocolate chips
- Pastry bag or plastic bag
- Oreo Cookies or other chocolate sandwich cookies
- 3 to 5 rectangle fudge covered cookies (like Keebler Deluxe Grahams)
- Candy rocks (optional)
- 2 cake cones
- 3 sugar cones
- Parchment paper
- 9×13 inch piece of cardboard
- Cake foil
How To Make a Haunted Castle Cake:
1. Bake 2- 9 inch cakes and 2 -6 inch cakes according to the recipe or box directions. Set them aside to cool.
2. While the cakes are cooling melt about ½ cup of the white melting chocolate according to the package directions.
3. Use the melted chocolate to make ghosts. Spoon one teaspoon of melted chocolate onto parchment paper, to make the ghost’s head. Pull down on the spoon as you lift it away to trail melted chocolate to make the ghost’s body and tail. Repeat the process until you have 5 or 6 ghosts to haunt your castle cake.
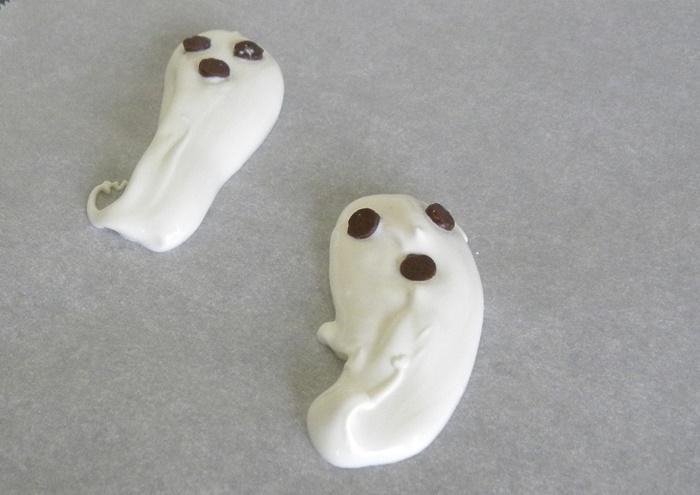
4. Add 2 mini chocolate chips for the eyes, and one for the mouth while the ghosts are still melted. Set the ghosts aside to cool and dry.
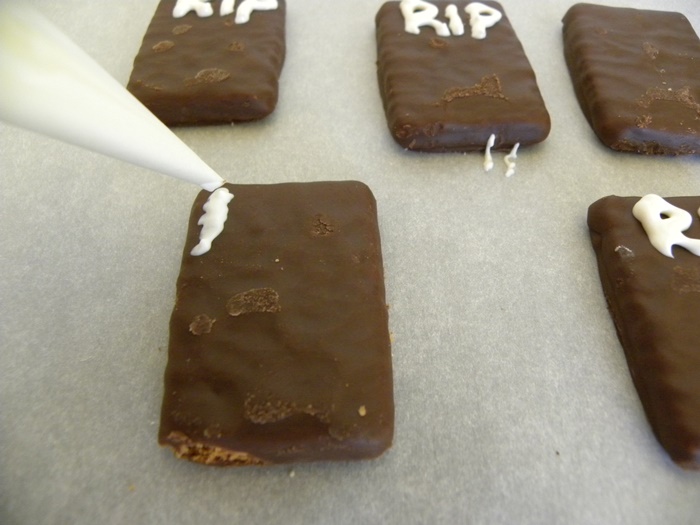
5. Add a little of the melted white chocolate to a pastry bag, or a plastic bag with a small hole cut in the tip or corner. Use the white chocolate to pipe “RIP” on one end of the graham cookies (see photo). Set them aside to cool and harden.
6. Melt the rest of the bag of white chocolates according to the package directions, and add back in any leftover chocolate from making the ghosts. Add a little black food coloring to make the melted chocolate gray.
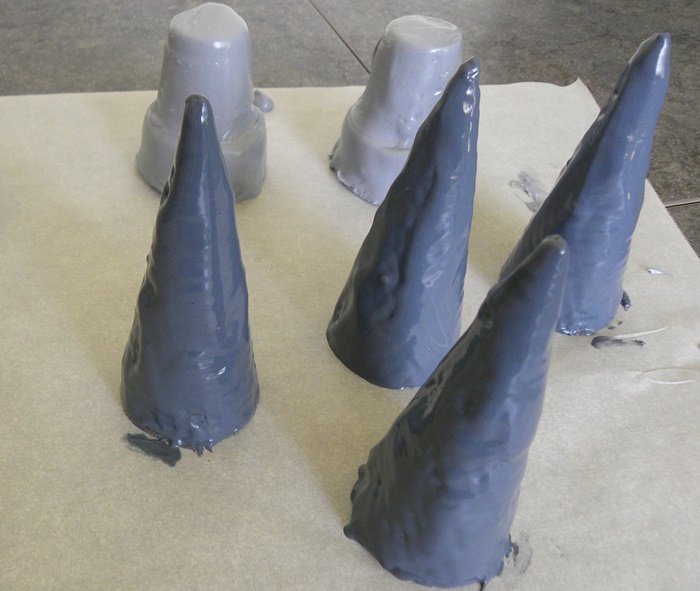
7. Dip 2 cake cones in the melted gray chocolate to coat the outside of the cone, set them aside with open end down to cool and harden.
8. Add a little more black food color to the remaining chocolate to make it a darker gray, and dip 3 of the sugar cones in the darker gray icing to coat the outside. You can dip extra cones, just in case one doesn’t turn out. Set the cones aside with the open end down to cool and harden.
9. Cover a rectangle piece of 9×13 inch piece of cardboard with cake foil, and tape it down.
10. While the cakes are cooling, color the decorator icing gray by adding a little black food color to it, until it is a light to medium shade of gray.
11. Once your cakes have cooled level the tops with a serrated knife.
12. Spread a little gray decorator icing in the center of the cake board, and set one of the 9 inch cakes on top, cut side down.
13. Spread icing on top of the bottom layer of cake, and add the second 9 inch cake.
14. Spread icing on top of the second layer, and add one of the 6 inch cakes on top of that, repeat the process to add the final 6 inch cake to the top.
15. Spread a thin layer of gray icing over the outside of the whole cake, and set the cake aside for a few minutes to let the icing dry and harden to seal in the crumbs.

16. Once the cake has had a few minutes to dry add a second thicker layer of gray icing to the whole cake.
17. Let the icing dry for 15 to 20 minutes, then use a piece of parchment paper to smooth out the rough spots in the icing. You can leave the cake a little rough, it will just add to a stucco appearance for the castle.
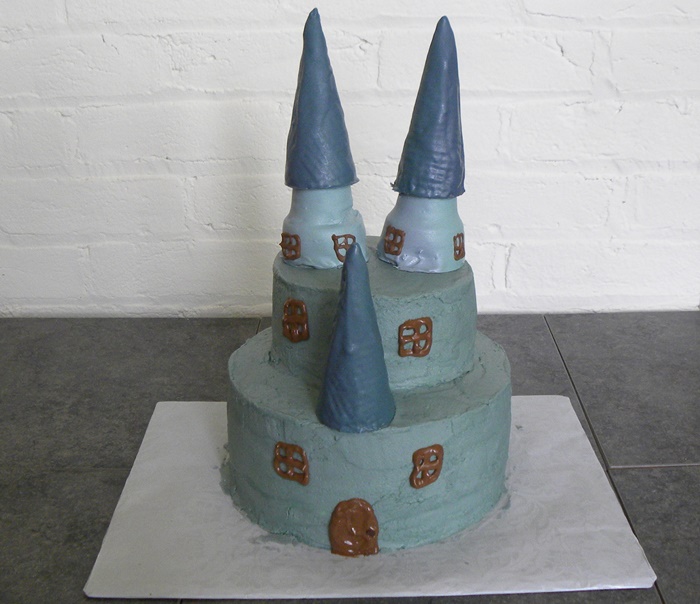
18. Add the cones to the top of the haunted castle cake to make towers and a roof.
- a. Add the cake cones to the top of the cake side by side, upside down, and slide the chocolate covered sugar cones on top.
- b. Just add a sugar cone to make the tower roof on top of the bottom layer (above the door, see photo).
19. Melt ½ cup of the regular brown melting chocolate, according to the package directions, and add it to a pastry bag with a small hole in the end, or to a plastic bag with a small hole cut in the corner.
20. Use the melted brown chocolate to pipe windows and a door onto the cake. You can also add some smaller windows to the cone towers. The windows don’t have to be perfectly straight, since you’re creating an old haunted castle look. A little lopsided and off center just adds to the look.
21. Once the windows and door have cooled and hardened, melt a little left over white chocolate, and use it to attach the ghosts around the cake, wherever you want to place them, coming out of windows, or towers. Attach the ghosts by spreading a little melted icing on the backs, and pressing them gently into the side of the cake.
22. You can also spread a little leftover gray icing onto the cake board around the cake. Make a couple mounds of icing in one corner, use the mounds to insert the cookie tombstones.
23. Crush up ½ bag of Oreos, or other chocolate sandwich cookies, and sprinkle them around the cake for dirt.
24. You can also add candy rocks to your haunted castle cake for a walkway in front of the castle door, and around your tombstones for graves, but if you don’t have them just add more crushed cookies.

Quick Tip:
Finally, you can pair the haunted castle cake and the haunted forest cupcakes and you’ll have it all to complete your haunting Halloween dessert table.
4 comments
Wow. That must have taken forever. You did an amazing job.
Oh wow! This is so cool! You did a great job! My daughter would love it! Can’t wait for the cupcake tutorial!
You did a great job on the haunted Castle cake. It would be the perfect centerpiece and dessert for a Halloween party.
This is an awesome tutorial! It looks so easy even us challenged decorators could make one.